Good morning you awesome camera geeks! Over the years, I’ve catered to camera and photography lovers of every kind.
Perhaps because I’m a collector myself, I’ve written a lot for camera collectors. I’ve tried to do both film and digital reviews because I love both but there’s one group I’ve not done a lot for. That group are the humble beginners.

I actually did a video on YouTube a couple of years ago called “The Benefits Of A Cheap Camera” in which I talked about the Vivitar V3800n, a cheap and affordable 35mm slr and although I tried to give some useful advice in the video, I don’t think a lot of people liked or understood my lighthearted approach and humor 😀
So today I will try to be more gentle and serious (if that’s possible!) in my approach
YouTube Video
The bulk of my advice today will be on my YouTube video. The young film beginner today is more likely to watch a video rather than read an article. For the rest of this article I will concentrate more on things I didn’t touch on in the video.
People can be funny sometimes. I’m sure a some people might say “Ah he’s just pushing his video!”
And the funny thing is, if the video is on Camera Legend YouTube and this is the Camera Legend blog, shouldn’t I be doing that?! It would be unwise of me not to 😍
But as you’ll see, this article touches on a lot that’s not on the video so consider it an addendum to the video.
Big Beginner Mistake
As beginners we all make mistakes. Heck even when not a beginner we make mistakes! At least I do still today 😀
To me though one of the biggest mistakes I see the beginner in 35mm film photography make is the notion that they have to be an expert camera operator first.
It’s not the beginners fault really. It’s perhaps all the “super photographers” they read about or see on YouTube but it seems to me they feel the need to learn aperture, shutter speeds, lighting, flash, everything all at once!
And yes it IS important to learn those fundamentals of photography but the truth of the matter is mastering these things take time and lots of practice.
Obsessing about learning camera function so much can make you overlook perhaps the most important aspect of photography: the actual picture. Taking the picture. Learning to focus the lens. Learning to compose. Developing an eye for a good picture.
So you say Sam, if I don’t know how to operate the aperture and shutter speeds then how am I going to take good pictures?!
Fear not! Let me introduce to something I call “The 1985 Method” 😀
The 1985 Method
No this isn’t actually a “method” I came up with but it’s how I developed a love for photography.
Back in the 80s as a youngster starting out, I usually shot sight unseen. Before I really got into photography, the camera was just a way of capturing my family, my friends, my world.
All I did was shoot and shoot. I knew nothing about aperture or shutter speeds. I knew nothing about composition or the rules of photography. I learned by discovery. And that still shapes a lot of how I approach things today.

The knowledge of light, aperture, shutter speeds, composition, that came later as I started buying books and magazines. You could say I started out photography the wrong way! Yet, some of those early photographs are the ones I cherish most.
It was photography in its purest form in my opinion before it became the “game.” A game of “you should do it this way or that way.” You should use this camera, buy this lens, etc, etc. I guess you could liken the experience to the innocence of a child before the realities of the world corrupts them.
As mentioned on these pages before, I dabbled in photography in the early 80s with my parents cameras with mixed results. It wasn’t until 1985 when Mom bought us a Minolta X-700 that I started getting (to me) great results, certainly better than I was getting previously. I’ve always considered the Minolta X-700 that I got in 1985 my first “serious” camera.

Even as a teen, I was getting roll after roll of consistently good results. As I got older, many of the photographers I met encouraged me to go back to all manual camera like the Pentax K1000, Nikon FM or Olympus OM-1. They told me I should do more “serious” photography. I did try those cameras and I loved them but I didn’t always get consistently good results like I got with my old Minolta.
With time and a lot of practice, I started getting results as good or better than the Minolta. I found out why…
It was because I often used the X-700 in the green P or Program mode. In this mode, the camera figured out the exposures for me and it mostly got it right most of the time! The Minolta was doing most of the hard work for me!
I was getting good pictures consistently and that inspired me to continue doing photography. And I have the Minolta X-700 and its great Program mode to thank for it!
Doing It The “Wrong” Way!
You see it all the time. Many photographers recommending a beginner start out with an all manual camera such as the Pentax K1000 or Olympus OM-1. Heck I’m a big pusher of that “hardcore” method 😂
So it may be a surprise to hear me say that for the beginning 35mm film photographer today I am not recommending they start out with an all manual camera any more. Even though in this YouTube generation things are easier than ever, I now advocate the beginner to start with a little bit of automation.
If you’re a beginner at 35mm film photography, I recommend you get a camera with a Program mode like the Minolta X-700 and I want you to use it! In addition, your first camera should also have an aperture priority or manual mode. I’ll explain more later.

I’m not the first person to advocate using the Program mode and I won’t be the last. And although the old “hardcore” method of having the beginner start out with an all manual camera is still near and dear to my heart, I realize it is actually a little bit of a “cruel” thing to do to a beginner 😍
A True Story
As a good example, back in the late 1970s my parents had a good friend who was really into photography. He had the great cameras like the Canon F-1 and A-1.
He was especially fond of his multimode A-1 and always got these great shots. He was always showing us slides and projections of his work.
I think I’ve mentioned before that this family friend was probably more responsible than anyone else for my interest in photography, cameras and lenses!
Anyway seeing all his great work, my parents asked his advice on getting a camera. He helped them choose the Canon AT-1. That’s right folks. Not the AE-1 or AE-1 Program but the no frills, manual mode only AT-1.
Guess what? My parents knowing nothing about aperture and shutter speeds, never bothered to shoot with the camera. It was never used until it was stolen from our apartment in 1982.
To this day, I wonder why our dear family friend, God Bless his soul, I wonder why he would recommend this camera to them and not proactively try to help them use it?
But as I said that was then. Today, young beginners can find everything they need to know online!
And since I’m in a kinder “ask what I can do for you” mood I am not going to be cruel and have them start on an all manual camera the way our friend did to my parents 😍
That may change though! 😂 And yes, it will change once we get into medium and large format cameras where automation is much less available.
The World Has Changed For 35mm Film Beginners
The main reason though why I no longer recommended the all manual camera “hardcore” method is because many different dynamics have changed. But one factor above all is a game changer. I’ll explain…
Back in the late 80s and all throughout the 1990s until perhaps the mid 2000s, I had one distinct advantage that film photography beginners today don’t. And that is something we took for granted called the “One Hour Photo.”
One Hour Photo?
What is a one hour photo? There was a movie starring Robin Williams called “One Hour Photo” but that’s not what I’m talking about 😀

I’m talking about the places that develop your film in about an hour. At its climax, they were everywhere in nearly every country. You remember, don’t you? Well old school photographers will remember it well but kids born after the year 2000 may have no clue.
Basically, before digital came around and shattered everything, film photography had developed to its highest point of convenience where in the USA stores like Costco, CVS, Walgreens, and even local camera shops and pharmacies offered to develop your color print films in about an hour or so. Many times it took longer than the advertised “hour” but you’d still get your prints back rather quickly.
Companies like Fujifilm and Konica often supplied the machines necessary to do this.
So if I were trying out a manual camera, I could theoretically finish the roll and get the results back the same day and I did so, often!
But as digital began to put a stranglehold on film in the mid 2000s, these one hour photo labs began to fold. Many were gone years earlier when they saw the writing on the wall.
Today, you would have to send your film to a dedicated lab. The usual time for you to get your results back is around two to three weeks for most labs. Costco stopped developing or sending out film for most of their stores but CVS and Walgreens will still send your film out for development. Sadly, a few years ago they began this bizarre policy of not returning your negatives so if you have them send out your film, the negatives are gone forever.
The disappearance of the one hour photo labs is perhaps the main reason I relearned to do my own black and white development. I couldn’t stand the wait!
For the budding beginner in 35mm film photography, it is unlikely that they would be developing their own photos and so they must wait.
Why Great Results Fast?
We live in a world where we want and usually get everything fast. I can’t just blame today’s kids for being impatient because I myself have been spoiled by the convenience of it all.
Before the internet, and even as recently as the late 1990s when there was some internet, you’d sometimes have to wait weeks for an order to arrive. Today, I get most of my online orders in two days! That’s a game changer and no one wants to go back.
But in the world of film photography, sadly 35mm film development (as far as the wait goes) has gone back to something worse than it was when it was at its best in the late 90s and early 2000s.
It is my feeling that waiting two to three weeks just to get back lousy results from that first roll of film will do nothing but curb the enthusiasm of all but the most determined beginner photographers.
So I recommend the beginner start out with the much maligned Program mode, get some good maybe even great results right away and get excited about 35mm film photography.
Yes you should know the Program mode is not foolproof. Most old cameras have center weighted metering that can be easily fooled by bright light sources. However I’m willing to bet that the Program mode is going to yield a better percentage of results than if one were going in blind or trying to remember what they read or saw in a tutorial.
Shoot in Program mode. At the same time watch some good YouTube tutorials, read a book and take notes. After a few rolls in Program mode, then start experimenting by gently going out of the Program mode.
Recommendations
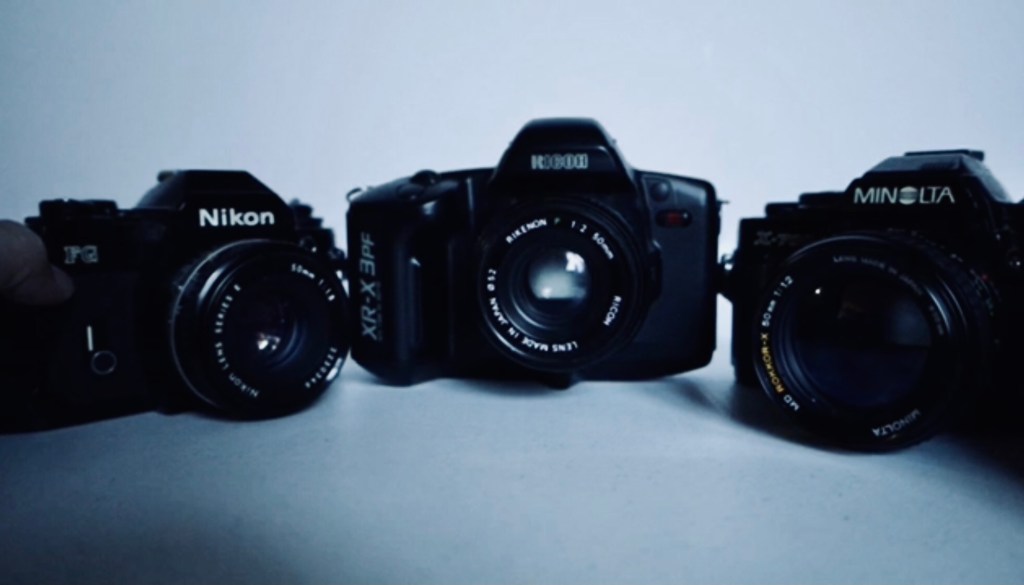
In my video I recommend and do a mini review on three cameras; the Nikon FG, the Ricoh XRX 3PF, and the Minolta X-700.
All three I have used and they all have a Program mode as well as manual mode.
I went into a lot of detail in the video so for the sake of time, I’ll just leave the details there for those interested. I also make recommendations on what to get for your first lens and also recommendations for film.
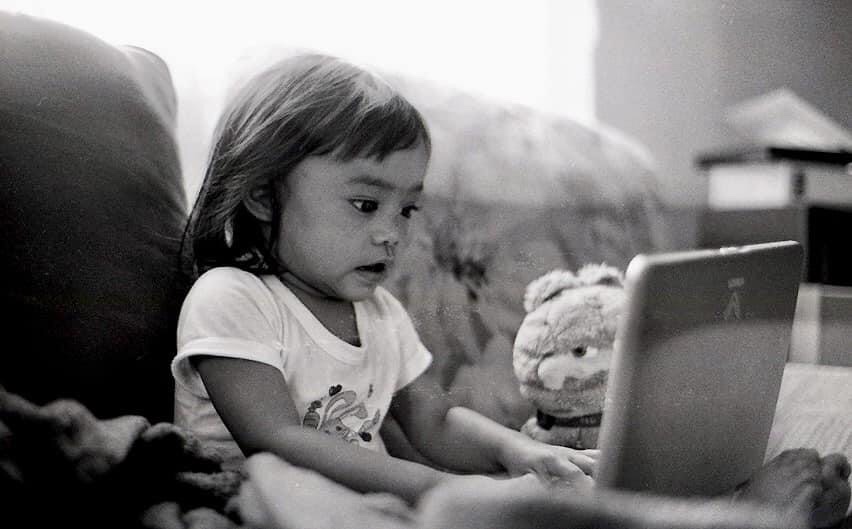
The photos below are extra samples from the humble 50mm lenses that I recommend a beginner start with.
By “humble” I’m talking about the 50mm f/1.8 or f/2 from any manufacturer and 50mm f/1.7 from some manufacturers.
The first shot was scanned with an Epson flatbed in 2010. The other two were crude iPhone X scans so they may not show the true nature of the images.
My Epson flatbed has gone caput and I’m trying to decide whether to go with a mid level scanner or a high end one. In addition to devoting time to YouTube, this one of the reasons you haven’t seen my work here. I’d really hate to continue giving you guys low quality scans! Y’all deserve the best 😍


As mentioned this article is an addendum to the YouTube video. Most of what’s on the video is not here and most of what’s here is not on the video. I’m not pushing you to the video for the sake of views. If that were the case I’d be making videos like crazy but I’m not. Note how long this article already is! 😀👍🏻
I figure those interested will check it out and those who don’t won’t.
Another point I didn’t touch on enough in the video is that it doesn’t have to be Nikon, Ricoh, or Minolta. You could get a Pentax Super Program if you like Pentax or Canon AE-1 Program if you like Canon. Any camera with a Program mode and a manual mode will do!
The main point is to get a camera with a good Program mode to start getting good results right away.
No Autofocus!
I however am NOT recommending that the beginner gets an autofocus film slr for their first film camera at this time. If you start with an autofocus camera and autofocus lenses then in my opinion you’re probably better off shooting with a DSLR.
I want you to have the Program mode for automatic exposures because exposures are probably the trickiest part for a beginner to understand, but I’d still want you to learn the “art” or the craft by learning to focus and compose. Get great results, get excited, and the rest will come to you with time, practice, and experience!
Conclusion
I can’t believe it took me all that space and time to basically say: Start out in the Program mode, get good to great results, get pumped about photography and work your way through the rest! You’ll be more interested in learning the camera when you start getting good results! 😀
Anyway this was the most I could put in one article but in future articles and videos we’ll work our way out of the Program mode so that you can work the camera and feel like a “real” photographer even though the Program mode will deliver 80-90 percent of the time! 😎
What is your opinion? Do you agree? Disagree? How did you learn 35mm photography? Leave a comment I’d love to hear it! In the end though, it’s just one man’s view so take it with a grain of salt and have a great day folks! 😍📸👍🏻
